

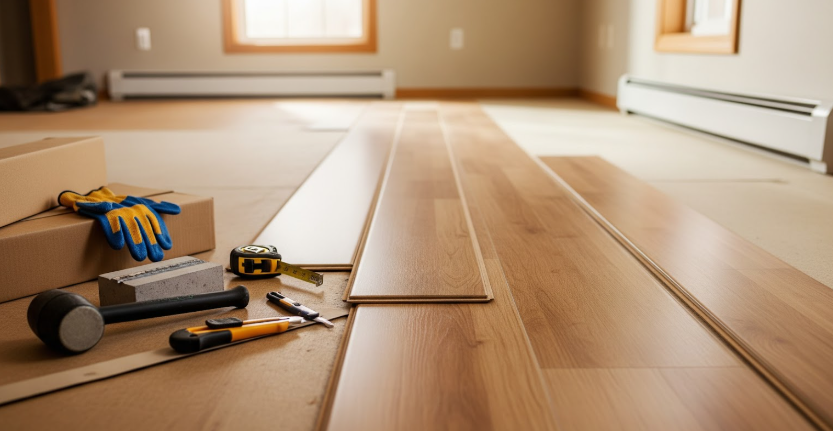
Why DIY Laminate Flooring Appeals to Maple Grove Homeowners
DIY laminate flooring projects have become increasingly popular in Maple Grove — and for good reason. Laminate offers the perfect combination of style, practicality, and affordability, making it an ideal choice for homeowners who want a fresh look without the cost of a full renovation. With realistic wood visuals, durable construction, and click-lock installation systems, laminate gives families the chance to update their floors with confidence.
Here in Minnesota, where long winters and seasonal moisture can affect flooring choices, laminate stands out as a dependable option. It handles temperature changes well, holds up to everyday activity, and offers the beautiful look of hardwood without the higher maintenance. DIY-friendly installation also gives Maple Grove homeowners the flexibility to work on their own timeline, whether updating a single room or refreshing an entire level.
Many local families explore laminate options at Town & Country Carpet and Floor Covering to compare styles, textures, and installation-ready planks. If you’re thinking about installing laminate yourself, this guide covers everything you need to know before starting.
Choosing the Right Laminate for Your Home
Before installing laminate flooring, selecting the right product is the most important step. The style, thickness, and core type all play a big role in how your floors perform over time.
Consider Your Home’s Style
Laminate comes in a wide range of looks — traditional oak, modern grey, farmhouse-inspired textures, matte finishes, and more. Start with the overall design of your home and choose a tone that complements your décor.
Think About Durability
Busy homes with kids or pets benefit from thicker planks and scratch-resistant finishes. Laminate with an AC3 or AC4 wear rating offers durable performance for active households.
Choose the Right Thickness
Thicker planks feel more solid underfoot and can help reduce sound. Many homeowners prefer 10mm or 12mm laminate for a stable, comfortable feel.
Pay Attention to Texture
Embossed-in-register textures create a realistic wood feel. Smooth planks suit modern interiors, while textured options feel more natural and grounded.
Taking time to explore your options ensures your laminate flooring supports your lifestyle, décor, and long-term comfort.
What You’ll Need Before You Begin
DIY laminate installation requires a few essential tools. Preparing early helps ensure a smooth, frustration-free process and reduces downtime once you start.
You’ll want to have:
Laminate planks
Underlayment (if not pre-attached)
Tape measure
Spacers
Utility knife
Rubber mallet
Pull bar
Tapping block
Level
Pencil
Jigsaw or laminate cutter
Having everything ready prevents interruptions and keeps your momentum going from the first plank to the last.
Preparing Your Space for Installation
Proper preparation is one of the most important parts of a successful laminate installation. Taking time to get the room ready helps the floor lay evenly and look smooth for years to come.
Clear the Room
Remove furniture, decorations, and obstacles. If applicable, remove old flooring and clean the subfloor thoroughly.
Check the Subfloor
Laminate performs best on a clean, level surface. Address dips, bumps, or uneven areas before installation. A flat surface prevents plank shifting or gaps later.
Let the Flooring Acclimate
Laminate needs time to adjust to Maple Grove’s indoor climate. Place planks in the room for at least 48 hours so they acclimate to temperature and humidity before installation begins.
Install Your Underlayment
If your laminate doesn’t have attached underlayment, install a separate layer. Underlayment provides cushioning, sound reduction, and moisture protection — especially important in Minnesota homes during seasonal changes.
Proper preparation ensures a smoother installation and better long-term performance.
Step-by-Step Guide to Installing Laminate Flooring
Step 1: Plan Your Layout
Decide which direction the planks will run. In most cases, running them parallel to the longest wall creates a more spacious feel. Map out your starting point and check for any tricky areas like doorways or corners.
Step 2: Leave Expansion Gaps
Laminate expands and contracts with temperature changes. Use spacers to leave a small gap around the room’s edges, ensuring the flooring stays flat year-round.
Step 3: Install the First Row
Lay the first row carefully, making sure each plank fits together cleanly. A straight, secure first row sets the tone for the entire installation.
Step 4: Click, Lock, and Tap
Most laminate planks use a click-lock system. Angle the planks, lock them in place, and gently tap with a rubber mallet and tapping block to tighten the seam.
Step 5: Stagger the Seams
Staggering the planks increases strength and creates a more natural, visually appealing layout. Avoid repeating patterns across rows.
Step 6: Cut to Fit
Around door frames, vents, or angled walls, use a jigsaw or cutter to shape the planks as needed. Carefully measure before cutting.
Step 7: Add Finishing Touches
Once the floor is complete, remove the spacers and install trim or baseboards to cover the expansion gap. Clean the floor to remove dust and enjoy your new space.
If you're browsing design ideas or comparing options for your project, many Maple Grove homeowners explore styles of laminate flooring to find the perfect fit before installing.
Avoiding Common DIY Mistakes
Skipping the Acclimation Period
Laminate that hasn’t adjusted to your home’s temperature may shift after installation.
Forgetting Expansion Gaps
Gaps prevent buckling and warping — an important detail for Minnesota’s climate.
Starting with an Uneven Subfloor
Uneven flooring causes gaps, weak spots, and long-term issues.
Rushing the Layout
Taking time to plan patterns, seam placement, and plank direction makes the finished floor look intentional and polished.
DIY projects feel more rewarding when you avoid the classic pitfalls that slow homeowners down or create future problems.
Caring for Your Laminate Flooring After Installation
Once installed, laminate is simple to maintain. A little ongoing care helps your new floors stay beautiful and fresh.
Sweep Regularly
Dust and grit can dull the surface over time. Regular sweeping keeps your floors looking their best.
Use the Right Cleaner
Laminate-friendly cleaners prevent streaking and protect the surface. Avoid harsh chemicals or excess moisture.
Protect High-Traffic Areas
Add rugs or mats to areas where pets or kids often play, such as hallways or living rooms.
Manage Spills Promptly
Laminate resists moisture, but cleaning spills quickly helps maintain a clean, safe surface for your home.
These easy habits keep your laminate performing well through every Minnesota season.
Enjoying the Results of Your DIY Project
Installing laminate flooring yourself allows you to transform your space in a way that feels hands-on, creative, and satisfying. The warm, modern look laminate brings to Maple Grove homes — combined with its durability and straightforward maintenance — makes it a rewarding project for homeowners who enjoy DIY improvements.
Whether you’re updating a single room or refreshing your whole home, laminate offers a stylish, comfortable, and reliable choice. If you’re looking for additional guidance or want help selecting the right style for your space, you can always get in touch for friendly, local support.


